Showing posts with label crafts. Show all posts

What's Hap-pinning: DIY Shelf

Wednesday, January 13, 2016

This weekend, Stephen and I built our first shelf! We're so excited/happy with how it turned out and we couldn't be more proud of our first big DIY home project. I honestly should wait to share this until I get it decorated and styled but as of now, I'm not sure when that will happen - so here it is!


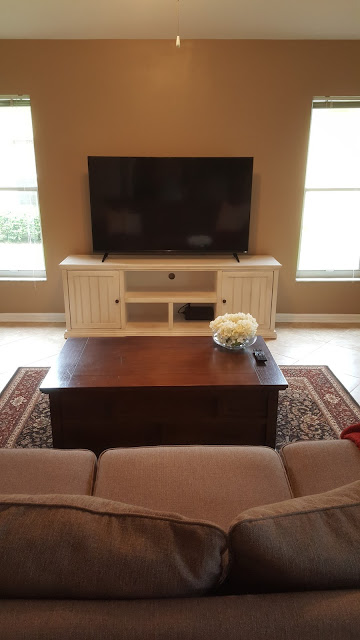
We knew we wanted something above the TV since it was kind of awkward blank space - Pinterest to the rescue! I found some plans for an easy $20 shelf from Shanty 2 Chic, got Stephen on board and then got to work. Our shelf ended up costing us $40 because we got Poplar wood, wood conditioner and a wood sealer (that's why I'm assuming it was more expensive).

Before (Even before I got stuff for the TV console)

After

Here are some highlights of our shelf - for full directions, check here.

  • We used two, 1x4 boards and one 1x1 board. The boards were 6' but we cut them down to 5.5' by hand since the saw was broken at Lowes.
  • An easy way to cut the wood by hand is make cuts/grooves with a Dremel tool and then use a hand saw in the groove made by the Dremel. This ensured us level and even cutting while using the hand saw and worked like a charm. 
  • Stephen hand sanded all of the pieces of wood and I did all of the conditioning and staining that way we had controlled variables.
  • We used a wood conditioner before staining and it made a big difference - it soaks the stain right up. The sealer makes an even bigger difference but we didn't want to wait a few extra days for it to dry so we'll save that for another project.
  • Stephen pushed for this color and had to sell me on it and I'm so glad he did!! I feel like it matches our coffee table perfectly!
  • We used wood glue to connect the 1x1 to the bottom 1x4. We used long screws to connect the bottom 1x4 to the side 1x4. We anchored it to the wall using 4 anchor screws into the board (which I will cover with picture frames since the screws are visible).


Some lessons learned:
  • When we used the wood glue, it oozed out and got on the visible parts of the board. We quickly wiped it off and thought we were okay - WRONG! You have to sand the areas that the glue touched off which means, you should sand that whole side of the board again to ensure it's even. If you don't sand it, the stain won't adhere as well and there will be light spots everywhere that glue touched. For us, it showed on the bottom and top of the bottom 1x4 board and we decided it isn't visible enough for us to redo it.
  • Stephen drilled pilot holes into everything but his pilot holes that connected the two boards weren't as level as he had thought and 4 screws caused the wood to bulge and crack. Thankfully, they were backup holes and weren't vital to the stability of the shelf so we took them out. We made sure he drilled everything straight into the wall and had no problems. 
We really enjoyed working on this project together and learned some very valuable lessons when it comes to working with wood. We're getting really excited about building a farmhouse table (unless I find a great one elsewhere lol).


We're just so tickled with how it turned out and think it really adds to our family room. Now I can't wait to decorate it!!

Linking up with Jessi.

How to Make a Diaper Cake

Wednesday, September 30, 2015

I've always loved diaper cakes and the adorable things you can do with them for baby showers. When my sister-in-law wanted to have a diaper raffle at her baby shower, I knew I wanted to make a diaper cake for her. I scoured Pinterest and got some great ideas - turns out, they're really not that hard to make!


*Diapers: I got a box of 112 size 2 diapers and I had at least 10 left over. Also, my cake is super fat compared to most diaper cakes so you can definitely reduce the amount of layers/diapers
**Ribbon: Most diaper cakes use 2 different kinds of ribbon. It's up to you what you'd like to do ribbon-wise. I used a pink ribbon that was wide and transparent underneath an opaque ribbon with a fun design

Step 1: Lay your diapers out on the table, overlapping each other at about their midpoint. Roll them onto your paper towel roll (I really should've taken a picture of this but failed... so I am using a picture from the blog I got some of the instructions from). I was able to do this by myself but it might get a little tricky so another set of hands would be helpful. This step also determines how thick your cake will end up being (the thickness of the paper towel roll will also determine the thickness of the cake so I suggest not using a full roll). Continue doing this for another 2 layers up your cake, making sure the thickness gets smaller as you go up. Secure your diapers around the paper towel roll with a rubber band.


Step 2: Once your layers are done, roll individual diapers into a "roll" and tape closed. Position the individually rolled diapers around the cake and secure with another rubber band, making sure the tape is facing the inside of the cake. Continue doing this on the other 2 layers. 


Step 3: Add your first layer of ribbon around each layer, covering the rubber bands and securing in the back with tape. Place your second layer of ribbon on top of the first and secure in the back with tape. Add a fun topper (this could be a big bow, ribbon, a gift - I had this giant ribbon from a previous gift and found it fit perfectly).


Step 4: Add some fun accessories! The possibilities are endless with this step - we had already gotten them a few gifts and I didn't want to go overboard so I added some headbands I snagged from Target. In order to transport the cake, you'll need a flat base. I cut a circle out of cardboard to match the cake diameter and placed it underneath.


Linking up with Jessi.

Tassel Garland Tutorial

Tuesday, September 1, 2015

Every year my group at work puts together a tailgate at a UF game for our customers. This year, I'm in charge of a welcome reception the night before. I wanted to make some cute little decorations for this event and decided to try my hand at a tassel garland. I followed this tutorial, which was super easy.

*As a disclaimer for those who know me: I do not like UF [like at all] but one weekend a year, I put my differences aside and help out at my company tailgate. I am slightly sad that this tutorial will be based on Gator colors. 


Depending on how you fold the paper will depend on the tassel size. Folding the paper this way created fatter, shorter tassels


To make these more fun, add some washi tape around the glued connection


These tassels were so easy to make and are such an adorable way to spruce up a party or even a home! I definitely want to make these for every season to hang in our house.

Christmas Holiday Link-up

Tuesday, December 16, 2014

I cannot believe it's already time for the last Holiday link-up! Time has seriously flown by. For the Christmas link-up I've decided to show y'all some simple Christmas gifts for co-workers, neighbors or friends as well as what I've decided to give my co-workers this year.

I love this but make sure you get something for the guys too ;) via

I love the idea of Christmas cookies in a jar! These are always so adorable! via If you need some good mason jar cookie ideas check this website and this website - it even has free recipe printables!

Love this easy and creative mason jar. You don't even have to bake and it looks adorable! There's even a free printable tag - although not sure I'd want to give the "I'd melt for you" tag to my co-workers ;)

Love the simplicity of this gift. Who doesn't love some Christmas m&m's? I love that they tell the Christmas story. A great way to remind those about the true meaning of Christmas. via

I think this gift is so adorable and creative! It also shouldn't ruin people's sugar diet's too bad... via

This gift is a little more involved but super adorable none the less. I love how they included a Christmas themed bowl/plate along with some yummy goodies! via

With so many of these amazing gift ideas, I hard a hard time deciding what to give my co-workers. I thought about doing a Christmas cookie in a jar but realized I'm not sure how many people want to bake (kind of obligated with that gift), plus my boss is doing really well on his diet and I'd hate to mess him up. Then I thought about doing the dip mix ornaments but then I wasn't sure how many people would enjoy that since you have to make the dip yourself and if it's just one person, that's a lot of dip. I finally decided on Chex mix mason jars. I figured it's delicious, there's no extra baking for the people receiving the gift, it shouldn't hurt a diet too bad and it's cost effective. 

Stephen was so sweet and made these adorable labels for me


I used the traditional Chex mix recipe on the side of the Chex mix cereal box. We've been using this recipe as long as I can remember and it's never failed us :) Hopefully everyone at work will like it!