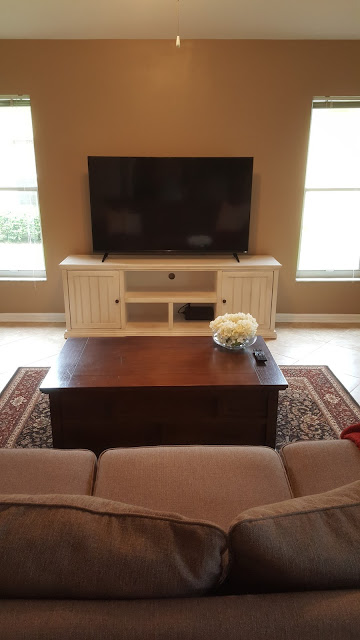
We knew we wanted something above the TV since it was kind of awkward blank space - Pinterest to the rescue! I found some plans for an easy $20 shelf from Shanty 2 Chic, got Stephen on board and then got to work. Our shelf ended up costing us $40 because we got Poplar wood, wood conditioner and a wood sealer (that's why I'm assuming it was more expensive).
Before (Even before I got stuff for the TV console)
After
Here are some highlights of our shelf - for full directions, check here.
- We used two, 1x4 boards and one 1x1 board. The boards were 6' but we cut them down to 5.5' by hand since the saw was broken at Lowes.
- An easy way to cut the wood by hand is make cuts/grooves with a Dremel tool and then use a hand saw in the groove made by the Dremel. This ensured us level and even cutting while using the hand saw and worked like a charm.
- Stephen hand sanded all of the pieces of wood and I did all of the conditioning and staining that way we had controlled variables.
- We used a wood conditioner before staining and it made a big difference - it soaks the stain right up. The sealer makes an even bigger difference but we didn't want to wait a few extra days for it to dry so we'll save that for another project.
- Stephen pushed for this color and had to sell me on it and I'm so glad he did!! I feel like it matches our coffee table perfectly!
- We used wood glue to connect the 1x1 to the bottom 1x4. We used long screws to connect the bottom 1x4 to the side 1x4. We anchored it to the wall using 4 anchor screws into the board (which I will cover with picture frames since the screws are visible).
Some lessons learned:
- When we used the wood glue, it oozed out and got on the visible parts of the board. We quickly wiped it off and thought we were okay - WRONG! You have to sand the areas that the glue touched off which means, you should sand that whole side of the board again to ensure it's even. If you don't sand it, the stain won't adhere as well and there will be light spots everywhere that glue touched. For us, it showed on the bottom and top of the bottom 1x4 board and we decided it isn't visible enough for us to redo it.
- Stephen drilled pilot holes into everything but his pilot holes that connected the two boards weren't as level as he had thought and 4 screws caused the wood to bulge and crack. Thankfully, they were backup holes and weren't vital to the stability of the shelf so we took them out. We made sure he drilled everything straight into the wall and had no problems.
We really enjoyed working on this project together and learned some very valuable lessons when it comes to working with wood. We're getting really excited about building a farmhouse table (unless I find a great one elsewhere lol).
We're just so tickled with how it turned out and think it really adds to our family room. Now I can't wait to decorate it!!
Linking up with Jessi.


That looks great! I am not very handy, so I'm always impressed when people can do home things that I can't!
ReplyDeleteChristina :: Simple and Delish
So fabulous! You already know how much I adore this!
ReplyDeleteSo cute! How exciting to get to decorate it and have the memory of building it together when you see it!
ReplyDeleteKelsey
www.thepeacockroost.com
Ahhh I love it!! It looks so good! :) Can't wait to see how y'all style it. I know it will look great.
ReplyDeleteYou can totally come hook me up, I wouldn't be mad.
ReplyDeleteWow it looks great! such a small thing made such a huge difference! great job!
ReplyDelete